
Hello everyone, been a while since I’ve written anything FM-related but I thought I’d do a write up on an experiment I’ve been running trying to make one of my favourite formations work in FM.
Ever since this save with VFB stuttgart in FM16 and coining out a 3-2-2-1-2 interpretation of a 3-4-3 that has brought me so much joy in the game I’ve tried to create similar systems in the follow up versions of the game but ultimately fell short of the same success mainly due to the change in behaviour of some key roles for the tactic – HB and DLP mainly and specifically, their interaction with the back line. Also worth noting the inability to manually set team fluidity and that being a consequence of duty setting on a player level.
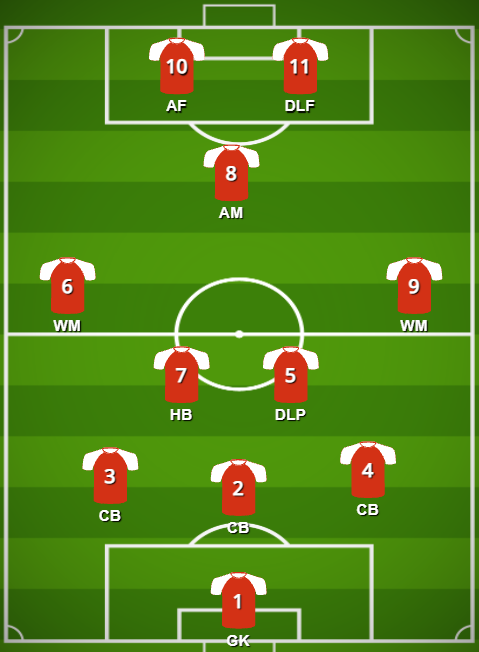
What I love about that formation is the fact that it uses the two holding midfielders to create cover for the defensive line rather than relying on wing-backs to run 20km per game up and down the wing as it is commonly expected from most used 3-4-3 variants. I mean, logically speaking, in order to form the ideal 5-man defensive line, doesn’t it make more sense to have 2 players already sitting deep drop back between the defenders in the defensive phase rather than expecting the wing backs that are positioned around the enemy box during the attacking phase to run all the pitch-length back? There would be, of course, implications regarding the absence of a midfield screen in front of the defenders in that scenario, however, nothing that can’t be managed without a bit of creativity regarding player positioning/movement. In the end, even one of the midfielders dropping in between the 3 CB’s would be enough to create a solid back 4, guarded by 1 DM.
Anyways, even though the HB or the DLP do not perform the drop between defenders as I would have liked them to in FM21 I thought I’d give this formation a go and document my thought process whilst I try to make this work.
Disclaimer – as counter-intuitive as it may seem this test is mostly about me finding the most work-able solution for this formation and listing out my ideas and reflections during the process rather than creating a world-beater tactic so please treat it accordingly
Part 1: Initial set-up and drawing board musings
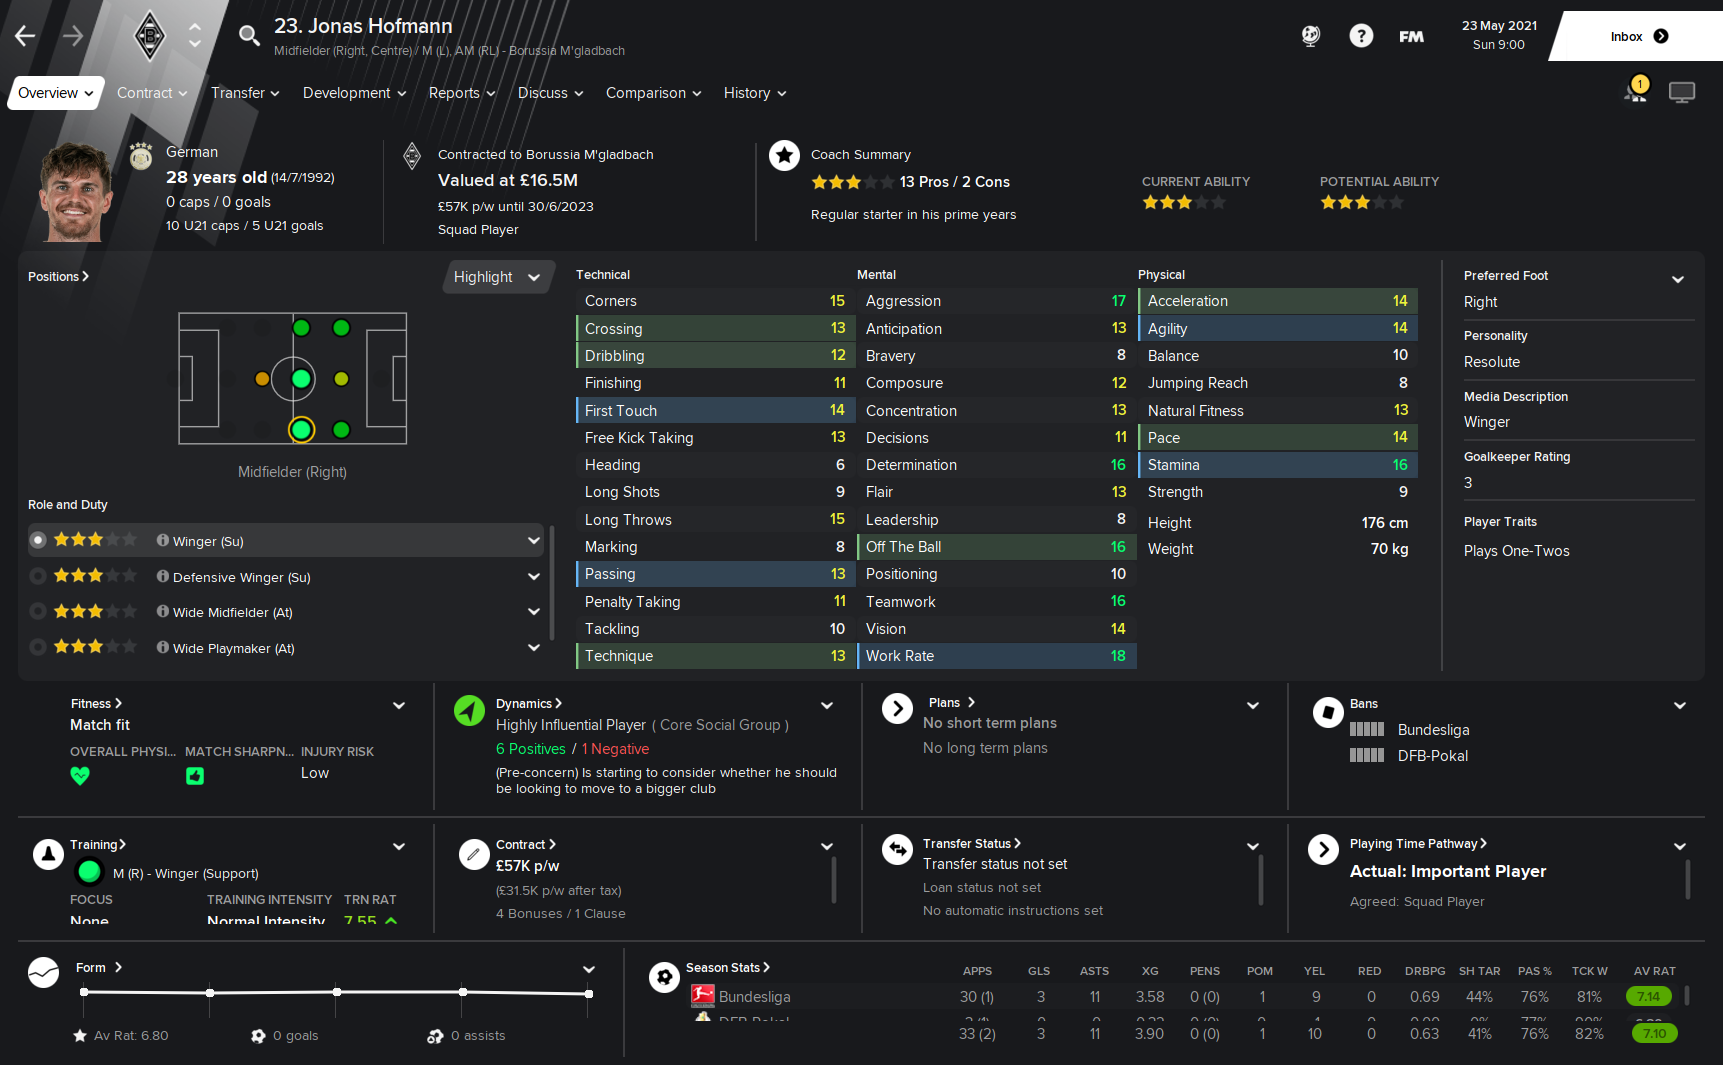
The club I’ve chosen to try this with is Borussia Monchengladbach, one of my favourite teams in the Bundesliga. With a media prediction of 5th it should also prove a decent enough challenge.

And beside the fact I’m half-in-love with the club’s history and style of play, the more pragmatic reasons for choosing this club lie in the stats:
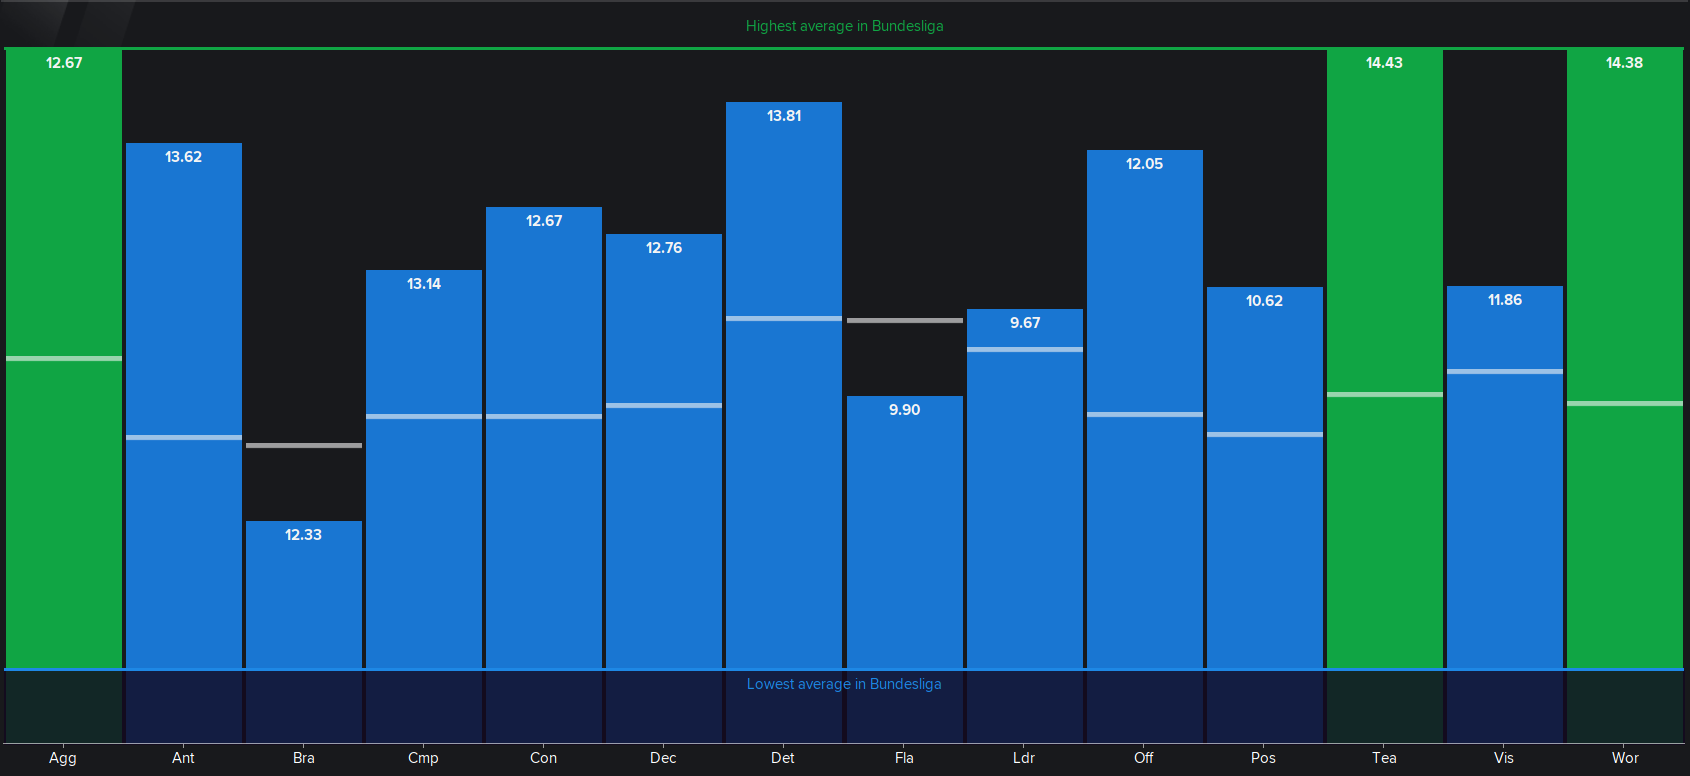
Highest rated team in the league for aggression, teamwork and work-rate as well as the available selection for wide players make this squad a perfect fit for what I’m envisioning regarding the tactical application.
So, the initial theories that I will use as pillars for the start the experiment will be the following:
1. Wide players acting as ‘wide shuttlers’ – not getting in too deep neither in the defensive phase, nor the attacking phase, rather acting as a wide passing option and a point of dispatch for crosses from deep and dangerous through balls angled towards the attacking front three. Their role will also be to create additional pressure in the middle of the field, where I will be looking to maximize the advantages of having basically 5 players pressing for the ball.
2. The two holding midfielders performing the duty of protecting/joining the backline (if I find a way to pull that off somehow) and most importantly (!) playing a wing-covering role together with the WMs and the Wide CBs in ‘the triangle of pressure’ aimed at covering the most problematic position for this formation: the hole

3. Employ a medium block in order to benefit from numerical superiority behind the ball and look to hit on the counter. Facilitate quick transitions by having fluid movement between the front three and rely on the AM to be the ‘carrier’ during offensive transitions

4. Defend Wide and force the opposition inside – by spreading the back three out and making space for the DM’s to (ideally) drop deep we could have a back line composed of either 5 or 7 players, depending on where the WMs are positioned when the opponent is close to our box – most likely in a ‘high camp’ scenario where the opponent is moving the ball side-ways in front of our defensive formation looking for an opening is where our WMs will join the backline, otherwise getting caught open on the counter will most likely leave us defending with our 5-man block consisting of the DMs and CBs. Even without the DM’s dropping in between CBs, by forcing the opposition inside we will have the numerical advantage against pretty much any formation, even midfield heavy like 4231AM or 4-3-1-2/ 4-3-2-1
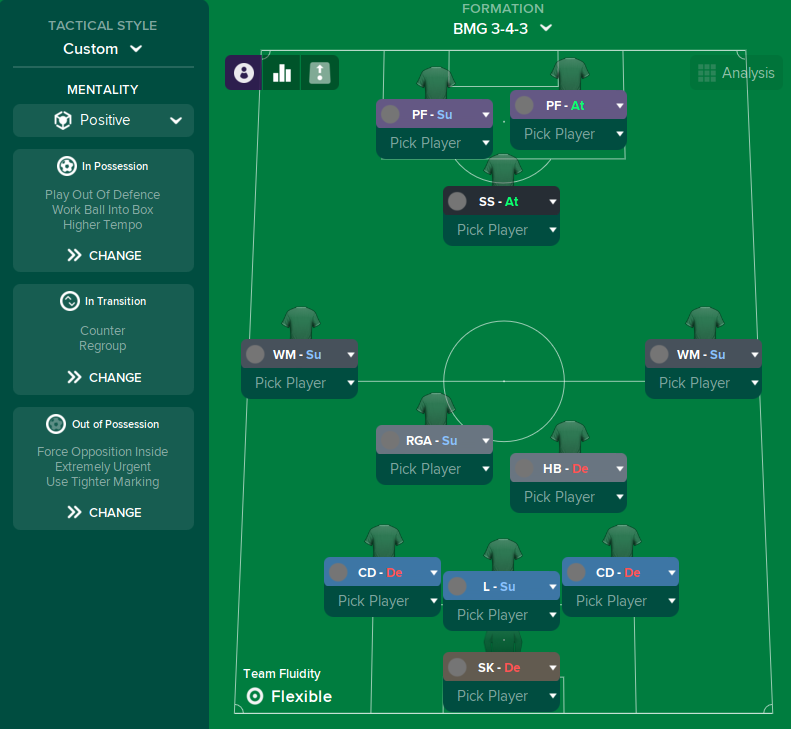
So, that being said, this is the ‘blank canvas’ I’m starting off with:
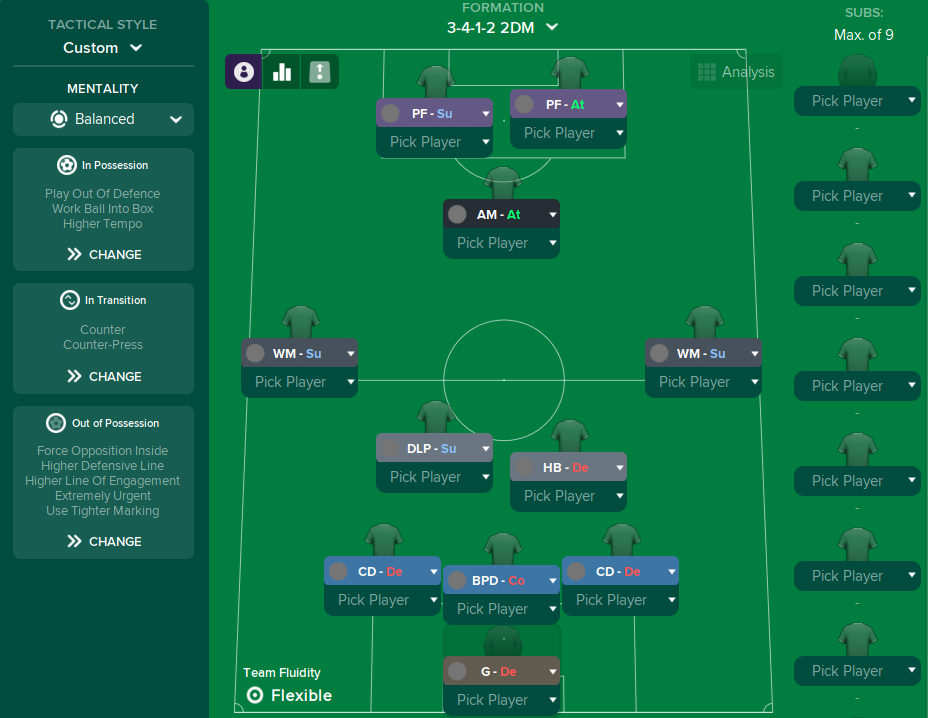
– I will see how the formation reacts to ‘gegen’-like instructions as I believe our numerical advantage in midfield could mix very well with counter-press mechanisms, allowing us to overwhelm the opposition whilst they try to build from the back or move the ball upfront through the middle. I have also instructed the AM to tackle harder as well, and given the PF role has that instruction hard-coded, we now have all front 3 instructed to press like hell and tackle hard.
– The PF(A) has been instructed to ‘roam from position’ in order to have freedom in exploiting space for the final ball opening. Both PFs have been instructed to shoot less often.
– Both CBs have been instructed to stay wider for obvious reasons
– the AM instructed to ‘roam from position’, ‘take more risks’, ‘move into channels’ and ‘get further forward’
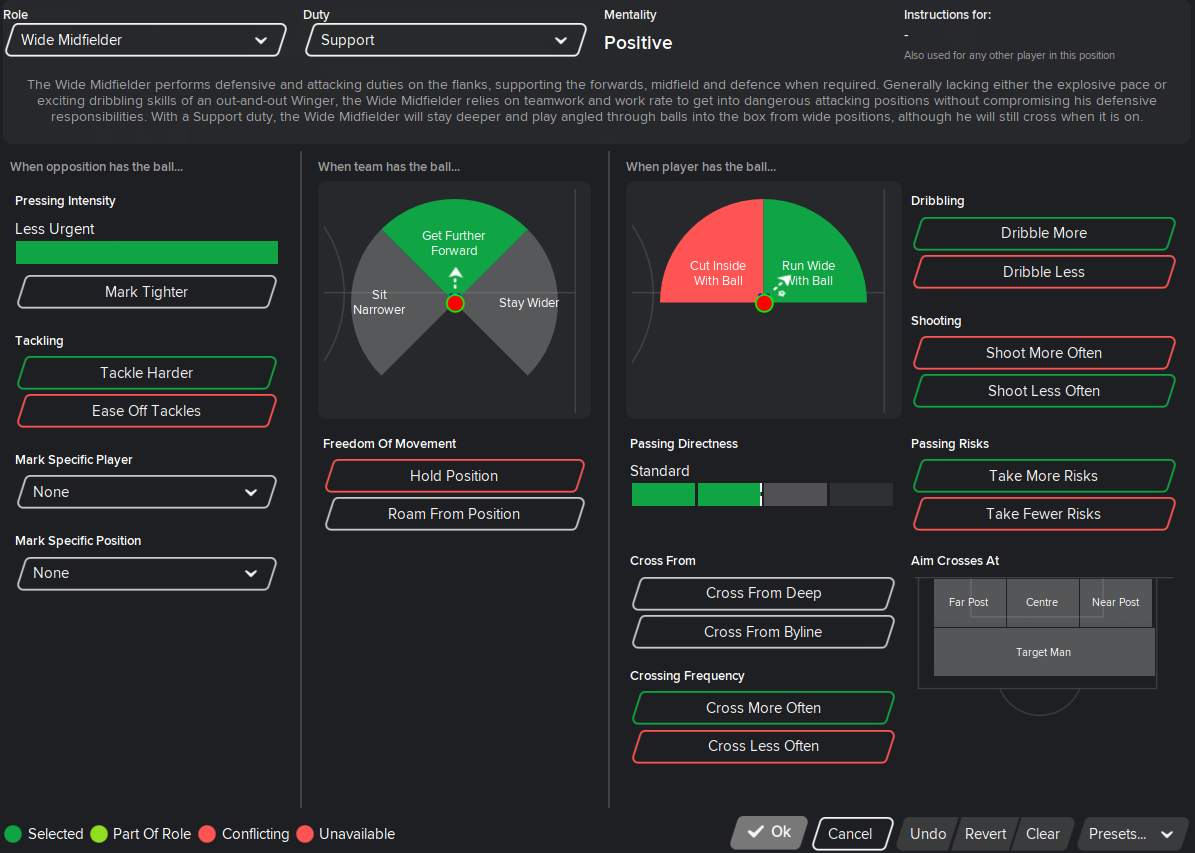
– I have set the WM role (probably one of my favourites in FM) for the wide players given that they are highly customize-able and offer great balance between attacking threat, defensive stability & overall team-interaction. For now, these are the PIs I have set, I will adapt the role as I go on.
Part 2: Spotting gaps & adjusting accordingly
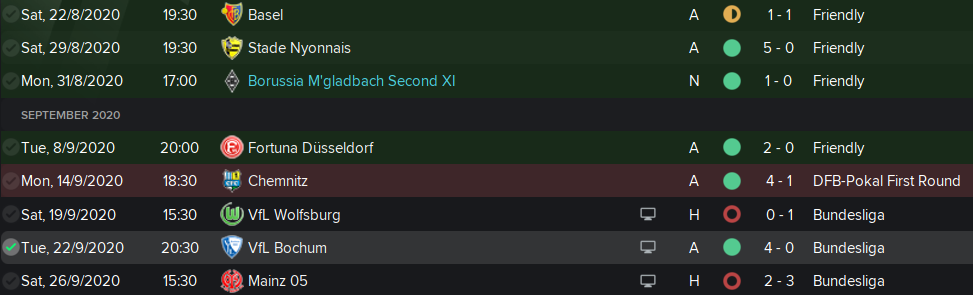
As always, the first few games are for analysis and adjustment, and we have started with a mixed bag:
The good
– strong diamond shape in the build up from deep phase allowing quick progression of the ball from back to front
– wide CBs ‘stay wider’ PI helps support WMs better than I anticipated
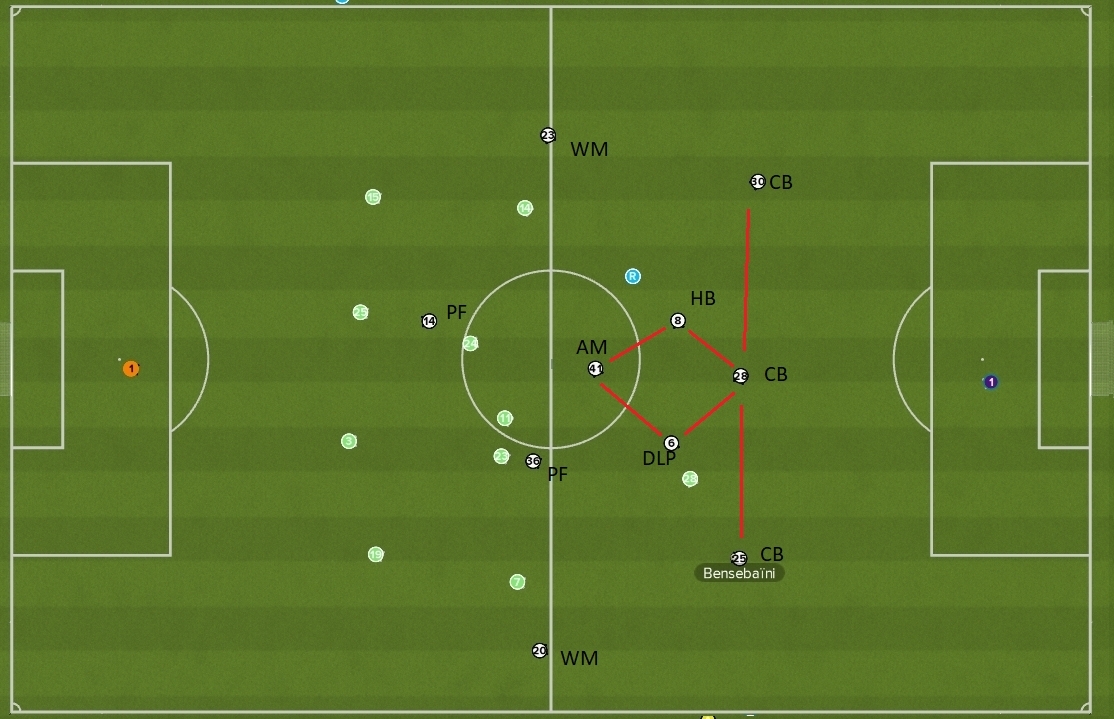
– the WM behaviour in defensive transitions is fantastic and it results in us having a 6-7 man backline in defence when transition is complete (enemy ‘camp in our box’ scenario)
– the HB does not drop nicely between the CBs as I expected but it maintains very close proximity to the backline which is hugely encouraging
The ‘could be better’
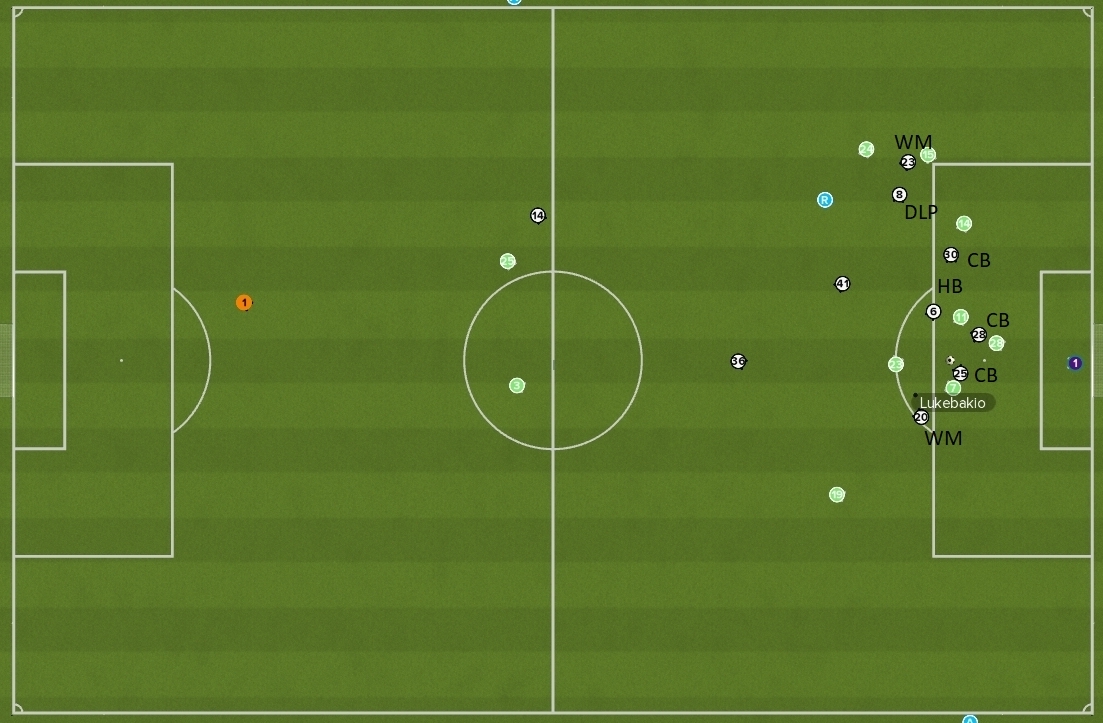
Gladbach vs. Wolfsburg
observation: the WMs are sitting too wide during the offensive transitions and often isolated from the closely-knit front three surging forward. Because they are both on support duties, they will never be ahead of the front two or the front three during the attacking phase and I don’t expect them to be: what I want from them is to stay closer to & interact more with the front three in the offensive transition as a passing option.
adjustments: ticked ‘sit narrower’ and ‘roam from position’ PIs for both WMs. In combination with ‘run wide’ this helps them stay narrower during the build up phase and only reach the extremis of the pitch by the end of the offensive transition and make wide runs only when the are on the ball, maintaining off the ball movement narrow. Roam from position ensure they exploit space more actively, working more to make themselves available for a receiving pass.
observation: the higher defensive line and counter-press instruction are leaving our team-shape exposed because the players favour staying high up in advanced positions once the opponent has gained the ball, specifically the DLP & the WMs.
adjustments: dropped both D-line and engagement line one notch (now set to standard) and changed from ‘counter-press’ to ‘regroup’ team instruction in order to make sure that once the ball is lost players will prioritize getting back into shape as quickly as possible. The lower d-line will also allow some extra time/buffer zone for the three CBs to stay off-pressure until the ‘re-group’ movement of the players is complete.
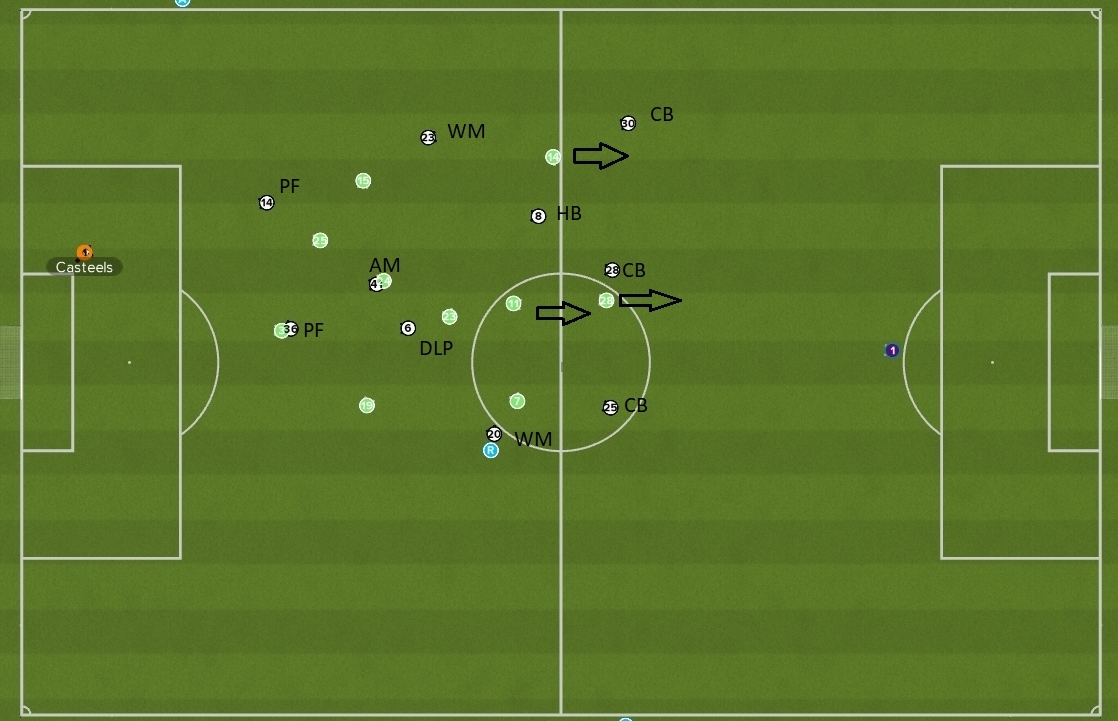
observation: the system is very successful in maintaining possession high up the pitch however there are many situations in which both, the DLP and the HB would benefit from a deeper passing option. as seen below, the HB is unable to pass to the BPD because he is too deep and marked by the opposition forward whilst passing to the wide CBs would offer less further passing opportunity.

adjustments: changed BPD to Libero(S) as the Libero pushes further up the pitch and offers more creative options in recycling the ball deep.
Gladbach vs. Mainz
observation: Whilst they do put pressure on the opposition quite well, the three players responsible for ‘the triangle’ covering ‘the hole’ are not effective in winning the ball from opposition players making wide runs: player. Out of all three, only the WM that is already instructed to tackle harder is performing best the blocking duties on the wing.
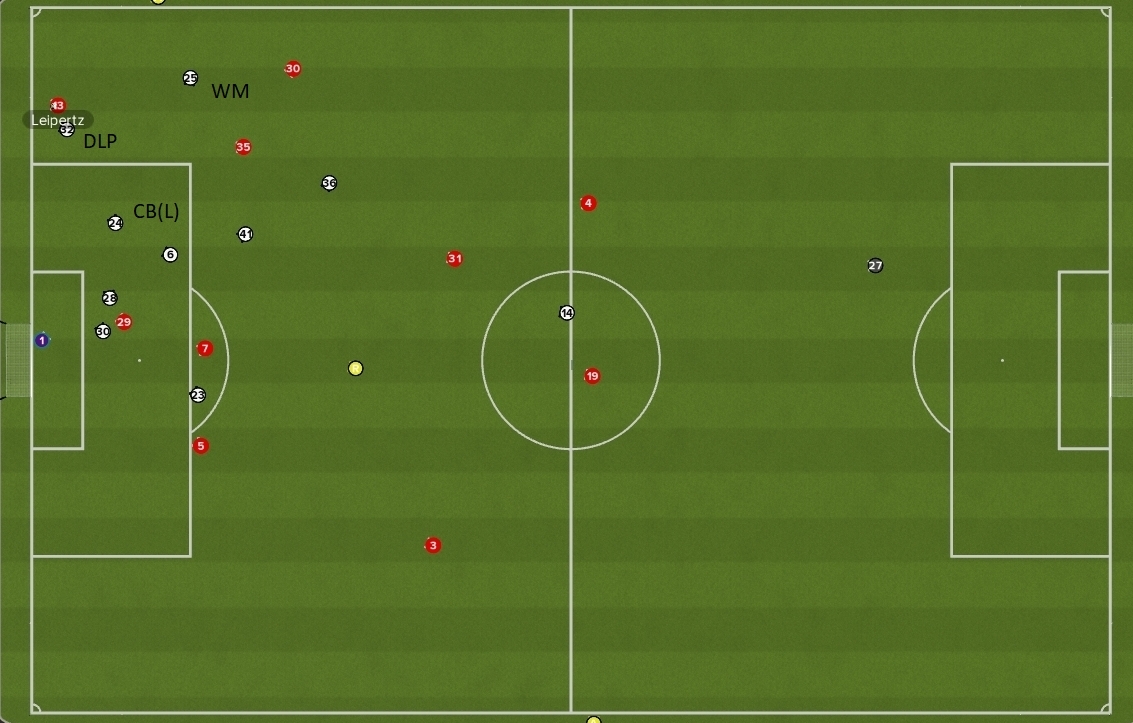
adjustments: instructed the wide CBs and the DLP & HB to tackle harder. Considering employing opposition instructions for AML/AMR or MR/ML players in the future if this adjustment is not successful.
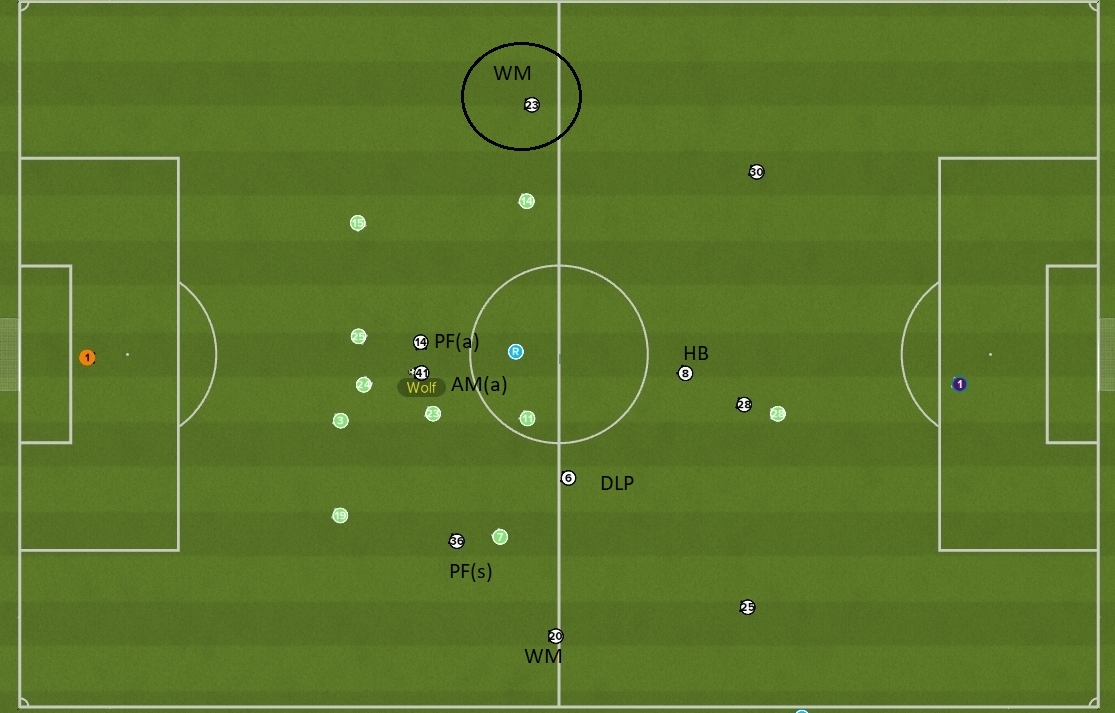
observation: the AM(a) is not positioned forward enough during counter breaks and is overlapping space with the DLP(S), focusing too much on the low-medium build-up phase. What I would prefer him to do in a ‘recycle ball’ scenario is to push forward and to only pick up the ball in the opposition third, looking to deliver the final ball or attack the goal himself.
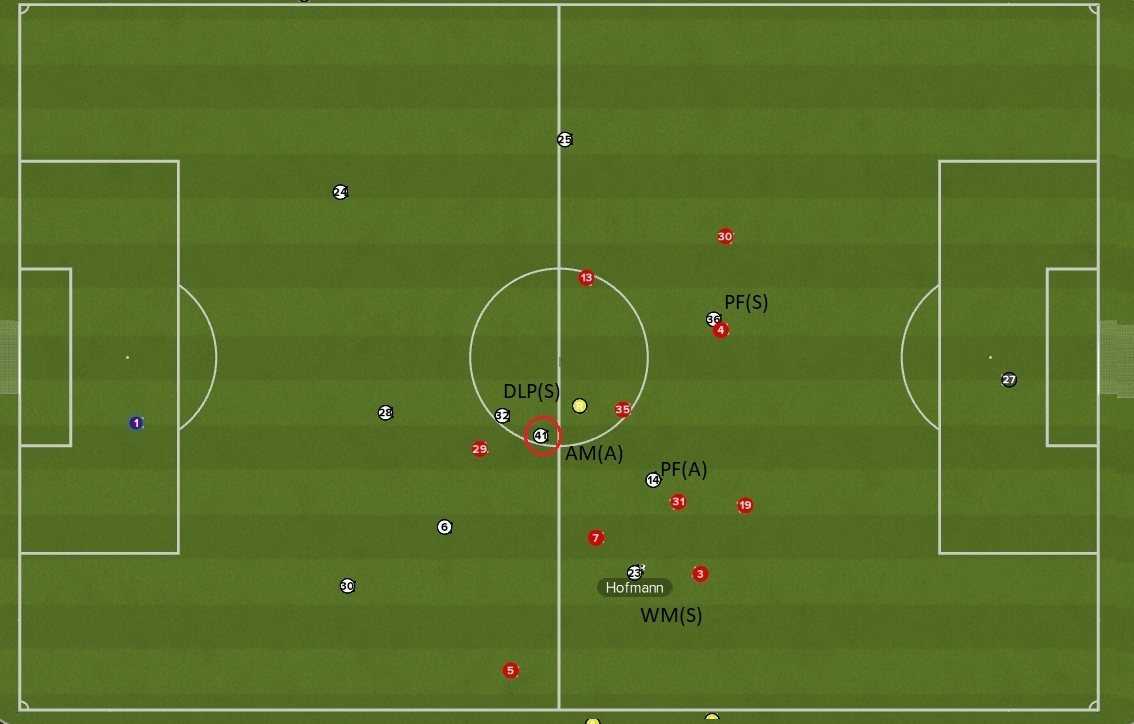
adjustments: changed AM(A) to Shadow Striker role. Considering changing DLP(S) to Regista (with ‘get further forward’ PI) in order to provide further pressure up the pitch whilst mounting counter-attacks – this should also help the left WM(s) being better supported high up the pitch
Adapted Version & Results
Having completed all of the above adjustments after the Mainz game, these are the results we have managed to obtain:
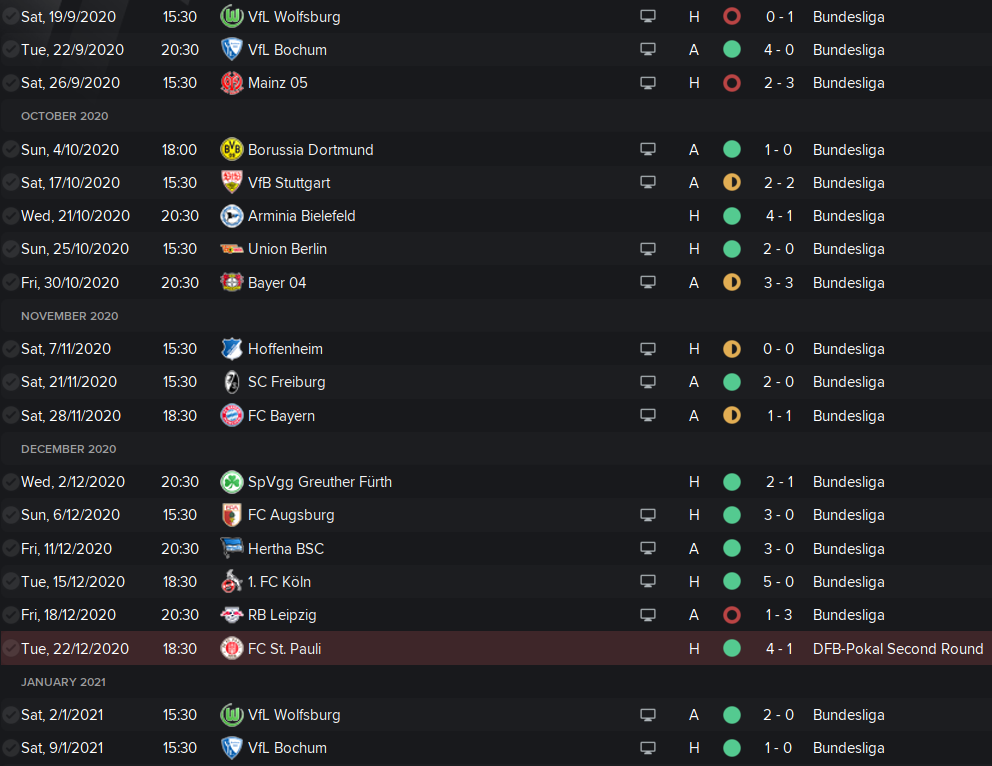
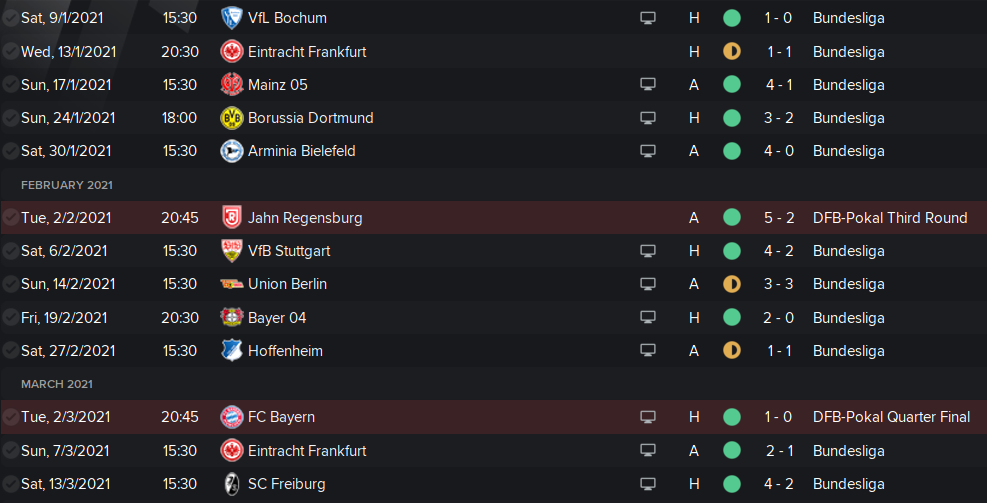
League
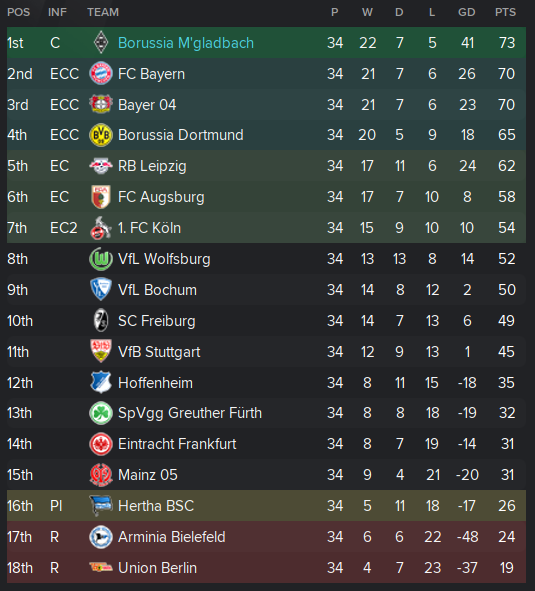
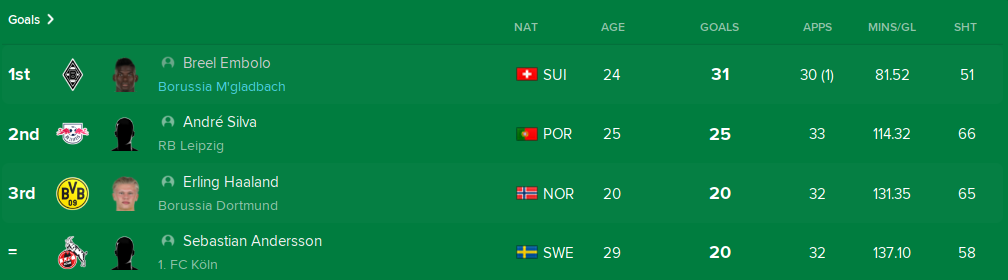
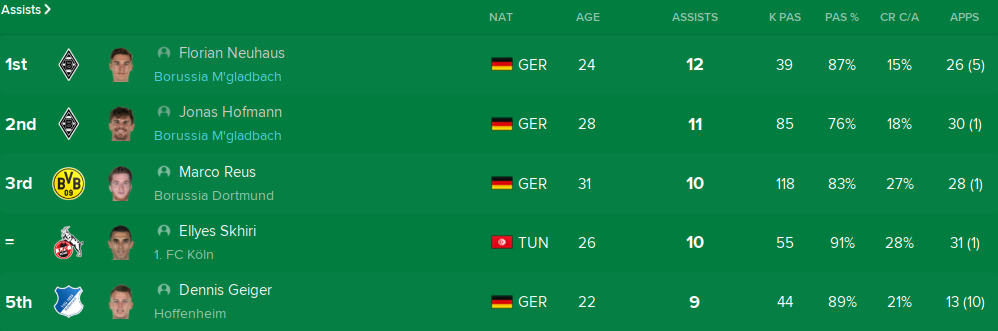
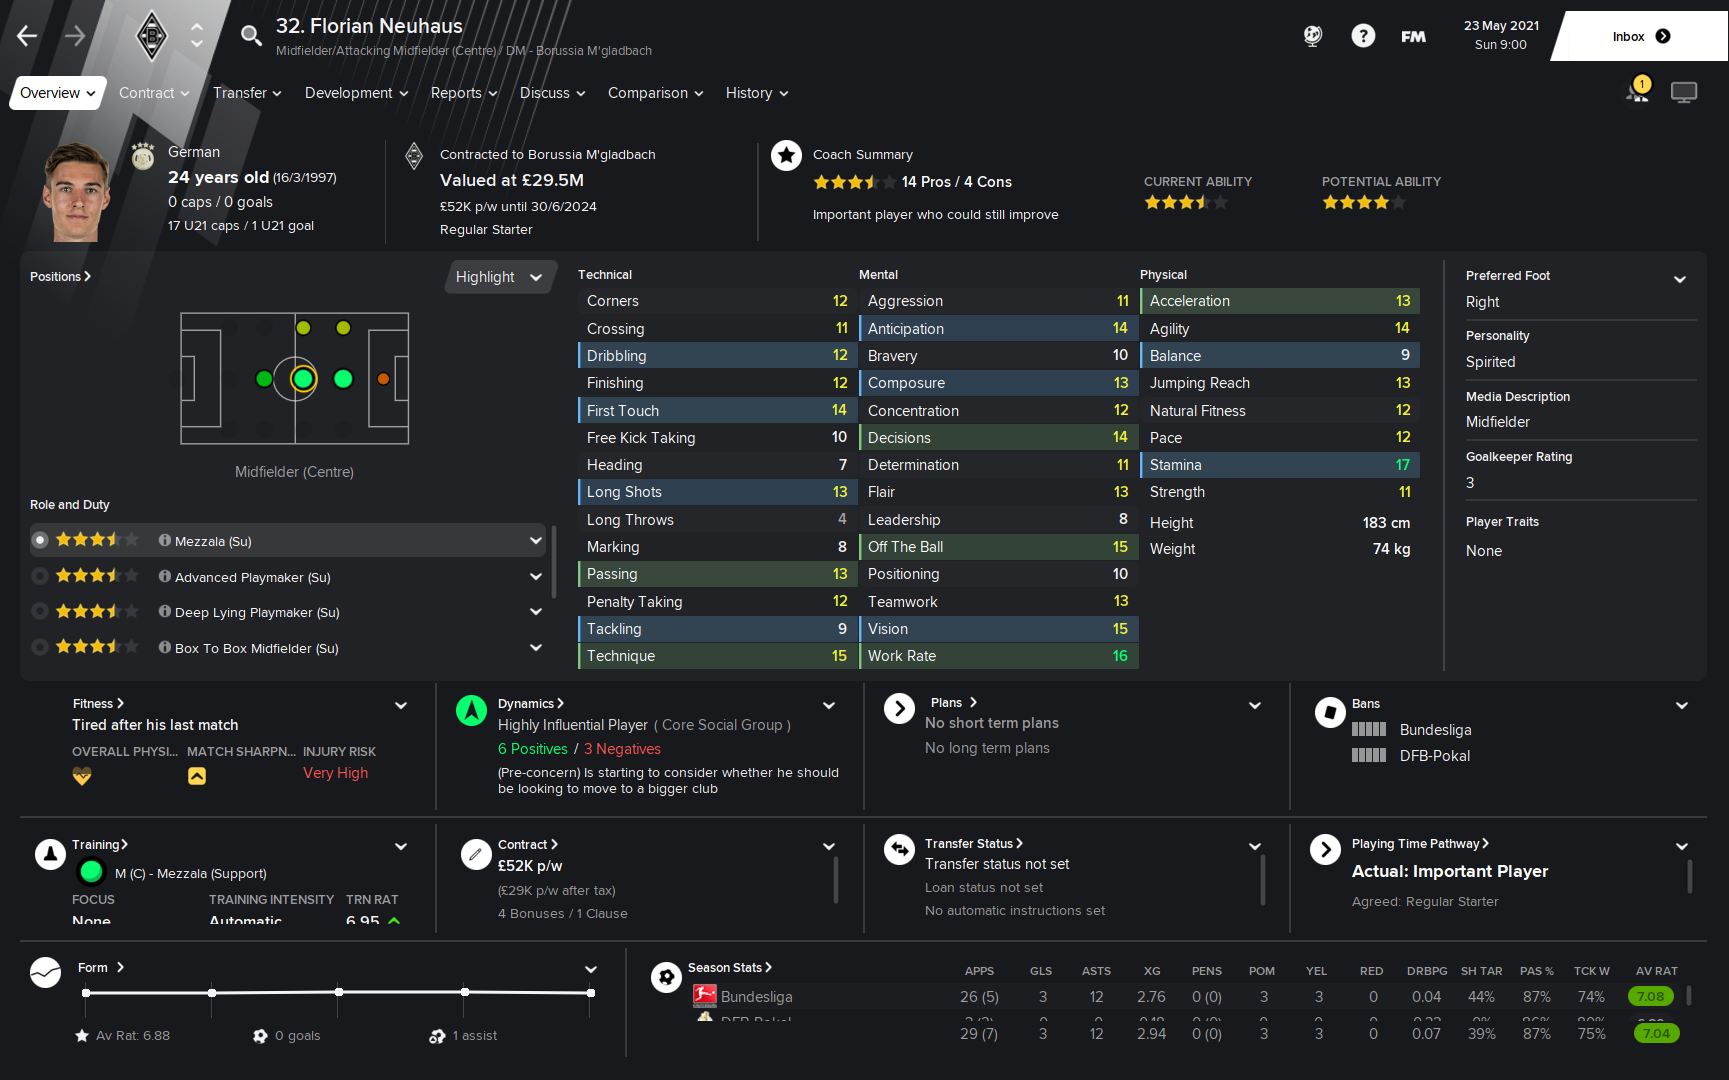
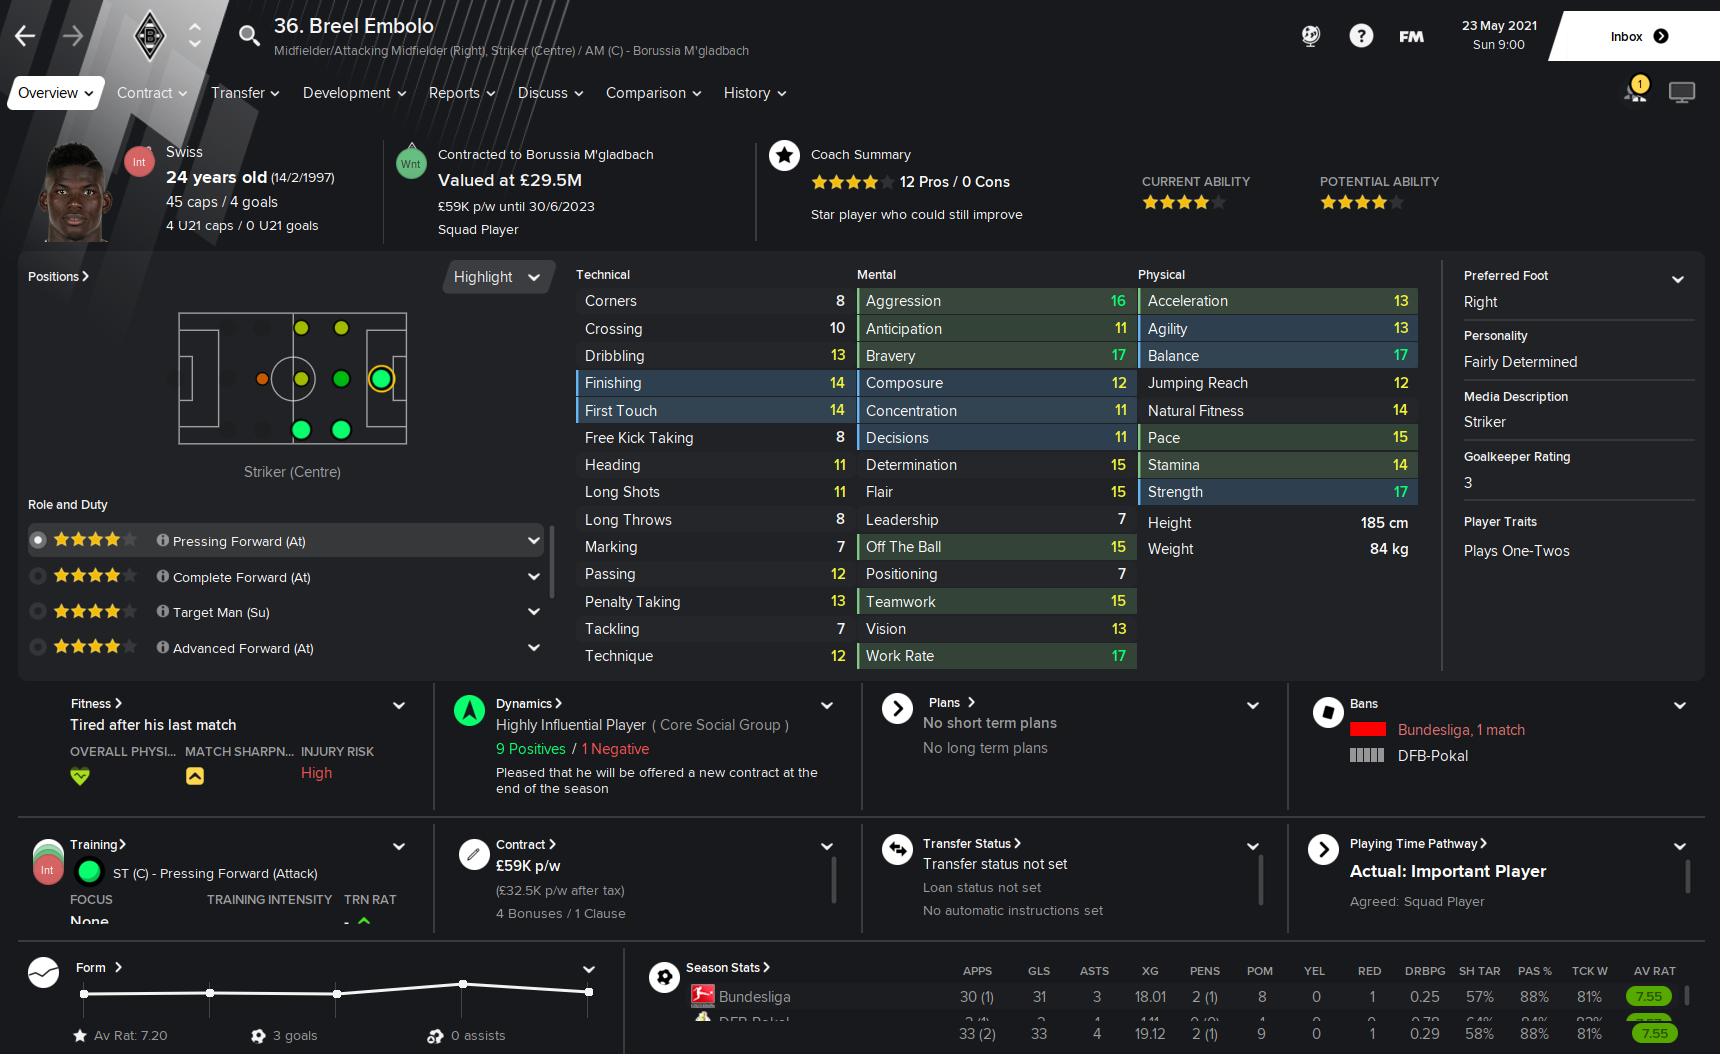
Our PF(A), Breel Embolo won the top scorer award with 31 goals in 30 matches and our Regista, Neuhaus, won the top assister award with 12, followed in second by our right WM with 11.
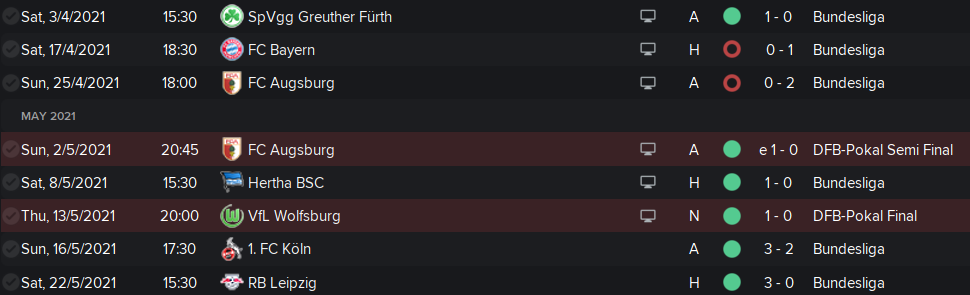
Cup
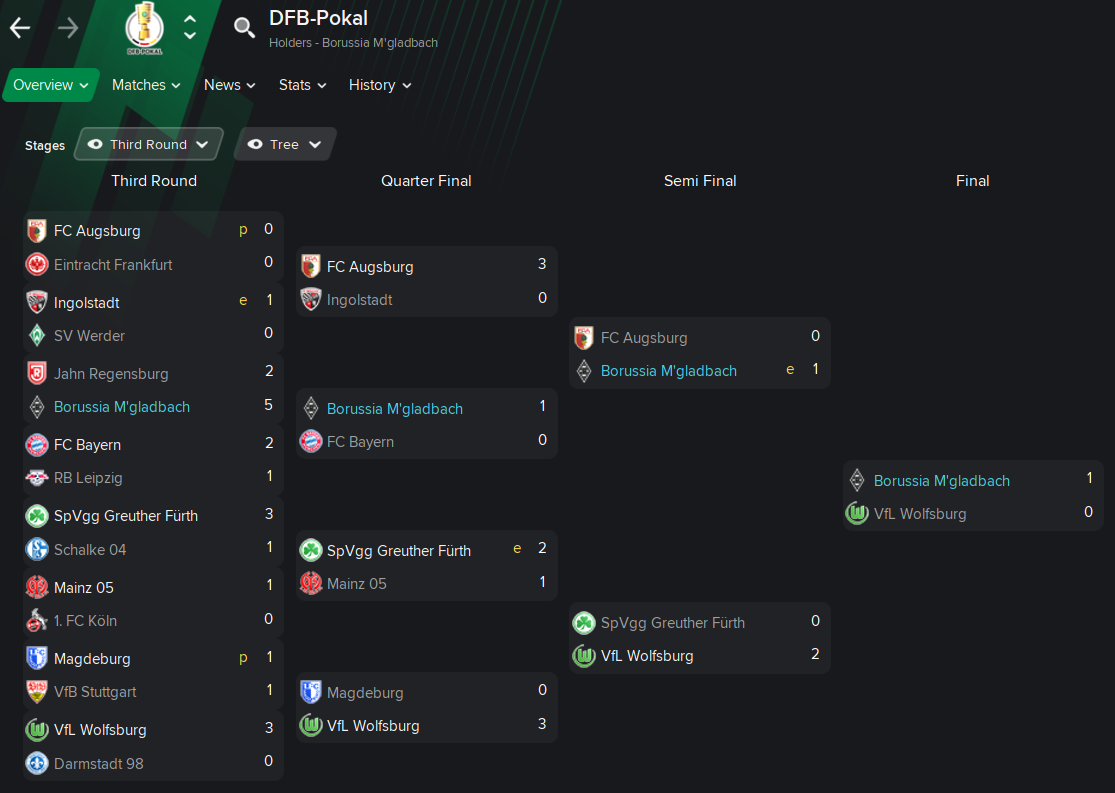
Pretty chuffed with the results of the test, although I have to admit that the very high work-rate of this BMG squad might actual blur some of the short-comings of this formation/system. I will test it out with another team just to have an all-round conclusion.
