
In the last post of part VI we looked at the strategy and logic behind creating a system, specifically focusing on key elements such as style, principles, balance and strategic considerations. As previously mentioned, the second post in this part will focus on issues like adapting your system to different circumstances, how to exploit the strengths of your squad and what matters the most when it comes to achieving balance in your style of play.
Recent interactions with a number of people in the community saw us hit a lot of stumbling blocks when it comes to interpretations of adaptability in football management, or at least….in FM 🙂 It is often tempting to just throw everything out of the window when it seems not to produce the wanted results. I’ve seen people re-shape the entire tactical set-up in the heat of the moment, choosing different roles, splashing instructions left and right and so on. The question is of course…how likely is it that’s going to get you success? In the short run you might get lucky and strike a vein in the FM match engine, but on the long run…well, let me put it this way – there are a few things that will help have a much better FM experience as well as learn more about football itself:
- try to understand/visualize the type of football you want to play, and if you’re not sure about certain aspects of it, learn learn and learn again, there are hundreds of free, fantastic sources online. Comprehensive highlights are the second best advice here – some of the most important parts of your tactical set-up lie in pieces of play that are not necessarily worthy of Sky Sports-like, crowd inspiring replays.
- single out the strengths/weaknesses of your squad and think about what kind of player traits/abilities your style requires, stresses, isolates, etc.
- do not make rash decisions and follow a quick rule of self-analysis on any action you make in the tactical creator. Why did I do that? How does that fit into my idea of play? How does that help the team?
- keep it simple, do not overload your mind with things you haven’t yet grasped in the game; take it one by one and see what the effects are, this way you will be able to start building blocks of knowledge and base your future decisions on something you know for sure
Sometimes what is the borderline between success and failure is the simplest of changes, providing it is logical to your circumstances. Sometimes decreasing the tempo a notch could increase your passing success rate by 20%, because your players aren’t good enough decision makers. Pushing the d-line up a notch can see you hit more shots on target, because your F9 is otherwise too far from goal. The list of examples could go on and on.
Another issue that came across in discussions about asymmetric formations was the fear of not covering space evenly, which is presumably a guarantee with symmetric formations. The assumption is understandable given the obsession of the international football media with the line-ups, formations and oracle predictions about the type of football you would see based on them. The fact remains, that you will perhaps see that starting formation as it is only 3-4 times during the match, in specific, almost coincidental cases. What does that mean? It means it doesn’t really matter. What does matter is the movement each player creates and above all – coverage of space.
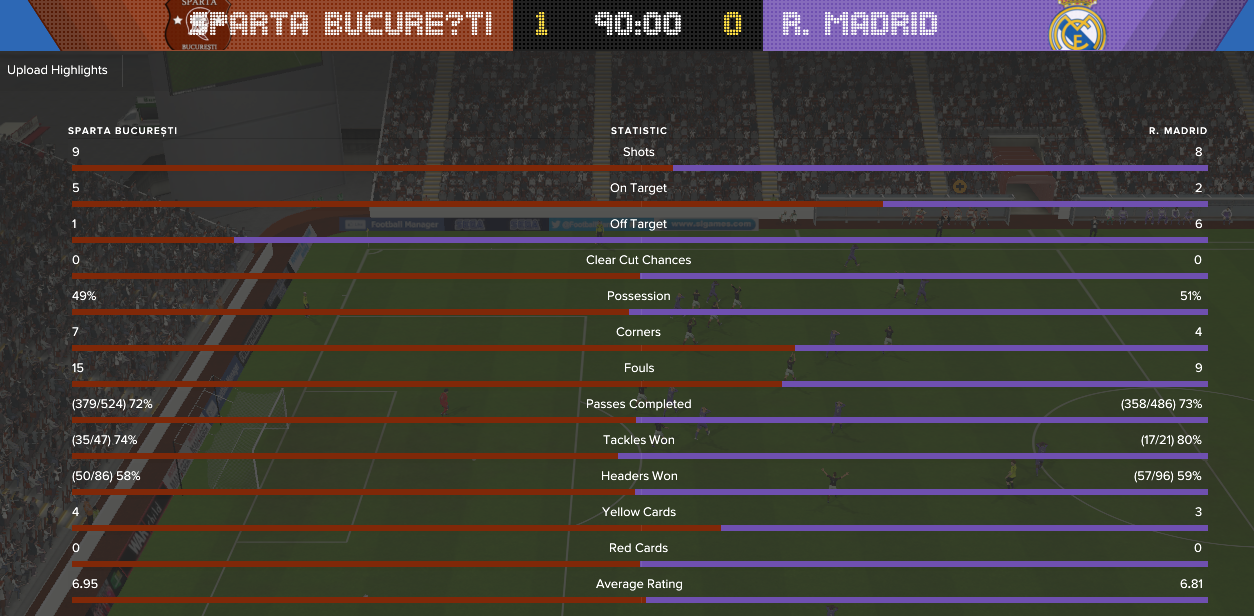
Sparta vs. Real Madrid
This match in the group stages of the CL was a massive challenge for us as we had to play the giants of Madrid. Going in as heavy underdogs, the obvious question is how do we cover space in that apparently problematic left-side of the pitch and make sure it doesn’t become a liability? I made a couple of changes from the initial set-up described in the previous post:

– moved the BWM(S) to the DM position to offer cover for our most vulnerable area, as the CWB ventures forward to support the attacks. he would still support our attacks high up enough, but would drop much deeper the moment we would lose possession, which gives the CWB more time to return to his position while being protected by the BWM.
– ticked the ‘stay more disciplined’ instruction so that we stay focused and reduce the risk of misplaced passes or ineffective creative outbursts from our players

Both the SS and the DF have the ‘roam from positions’ and the ‘move into channels’ instructions either added by me or ticked as default. What that means is that they will often drift around as well as out wide to offer support to the winger on the right or the attacking wing-back on the left.
the Defensive Forward (Dumitriu): drifting left to support the CWB, then running in the box to finish off the move after the SS was muscled out. This move also shows we have 3-4 men challenging for the final ball in the box.
the BWM(Blaga) covering for the CWB who mistimes his tackle and is caught out of position
Anticipation+Speed from the CWB allows him to intercept this ball and start a quick counter. Here you can also notice the quick transition from back to front, the involvement of the BBM (player takes final shot) and the DF holding up the ball waiting for on-running team-mates.
final result:
we kept Madrid at bay and even created a very respectable number of chances.
this goes to show that defensive stability can be achieved with a high risk mentality such as ‘attacking’ providing a few elements of play are functioning well:
– space coverage, or the ability of the team to maintain good control of all areas on the pitch, without allowing the opposition an ‘Achilles Heel’
– balanced duties that support and complement each other in their responsibilities on the pitch
– an understanding of the strengths and weaknesses of the style of football you play and how to react/adapt to potential threats
Further Analysis
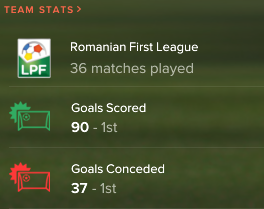
Using the initial system with minor in-match adjustments as exemplified above, we completely dominated the Romanian First Division this year, finishing the season unbeaten and scoring almost 3 goals per game:

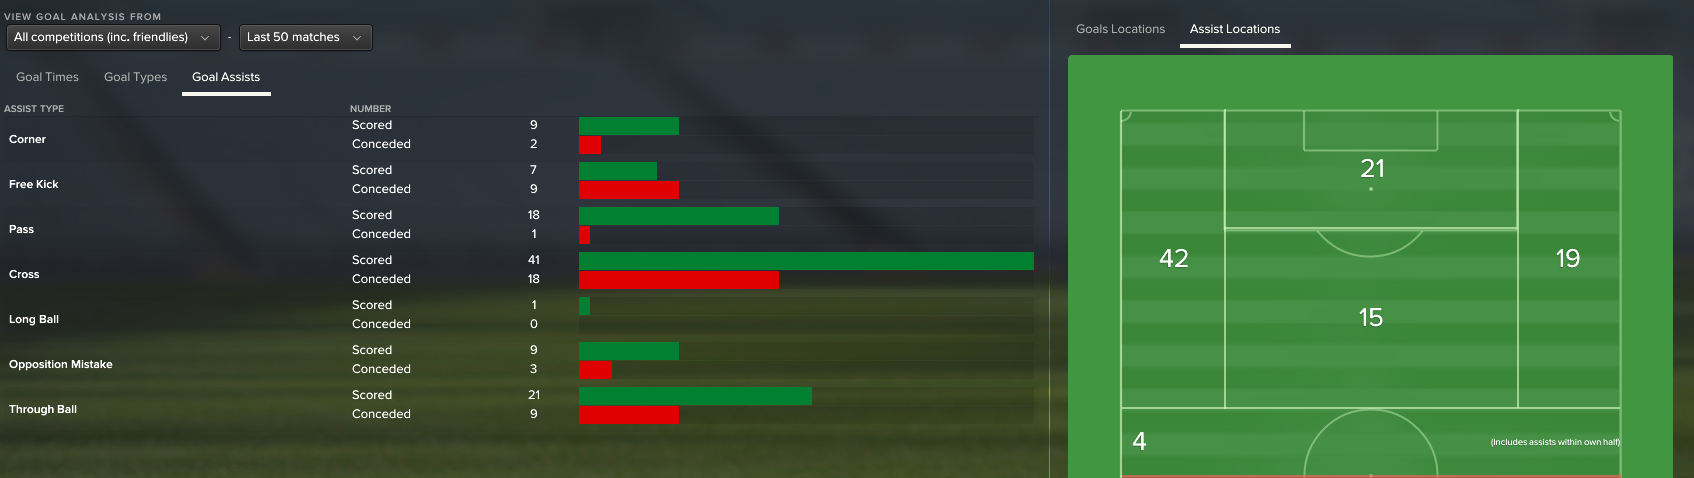
the assist map/type shows how efficient are the CWB and the players that drift into the open space on the left that is created as a result of overloading the middle-right of the pitch (usually the SS and the DF) Apart from that we have a very healthy mix of assists from all areas and of all types which shows that we are involving players in different areas in attacking moves as well as having a healthy balance of support options available. This graph also shows that what is our main strength (left flank) is also our main weakness in defence as we have mainly conceded goals assisted by crosses.
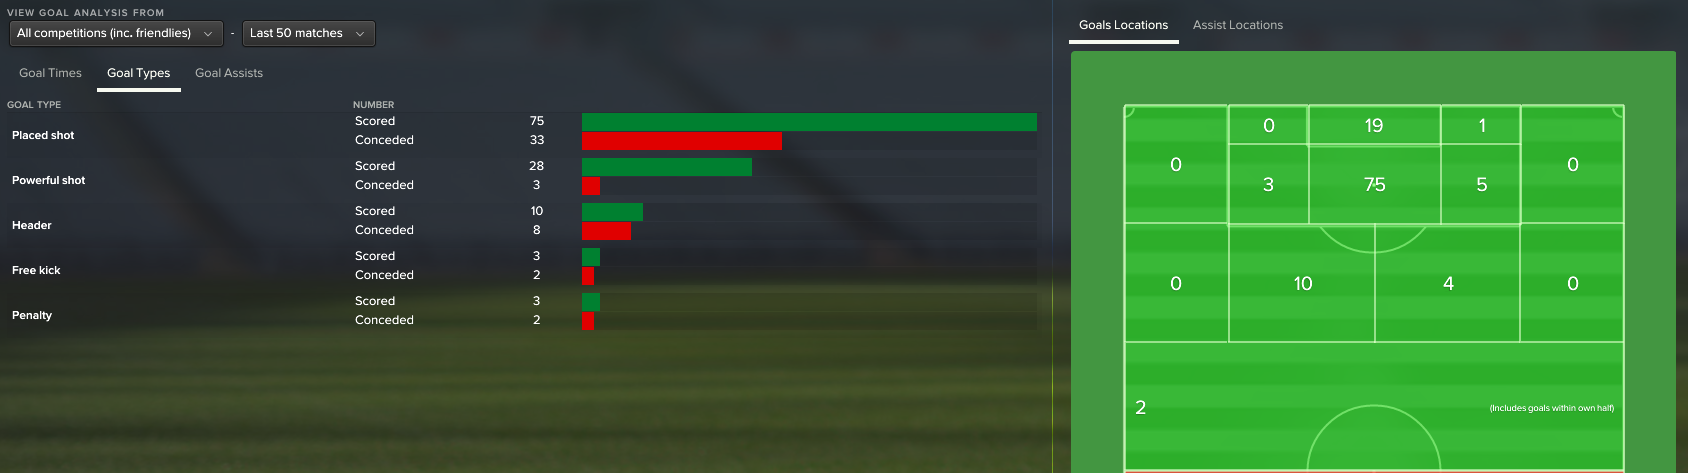
the goals we are scoring rely mostly on shots – either placed or powerful, and our lack of quality headers is quite a concern given the high number of crosses we put in the box. A possible explanation for that would be that we only have one or two players who are good in the air and both play in the DF position, which is most of the times caught a bit deeper in the final third, behind the SS and the AMR, and that would be one of the issues I would look at how to address in the future.
one of the key objectives in developing this system was to exploit our best player’s attacking ability as much as possible – Catalin Turcu (AMR)

the idea was to exploit Turcu’s ability both ways – in a supporting sense as well as in an offensive one. I want him to be a sort of wide forward, there to finish off the ball or beat the last defender with his great pace; I also want him to skip past his man and put in a cross or a dangerous pass when presented with the occasion.
What this required is a correct management of the attacking A-line: the fact that the DF is instructed to hold up the ball, as well as being a role that operates in the deeper area of the pitch, meant that our AMR would be the most advanced player on the pitch in most of our attacking moves:
in the same move that led to the goal against Madrid (GIF above), here’s how the A-line takes shape:
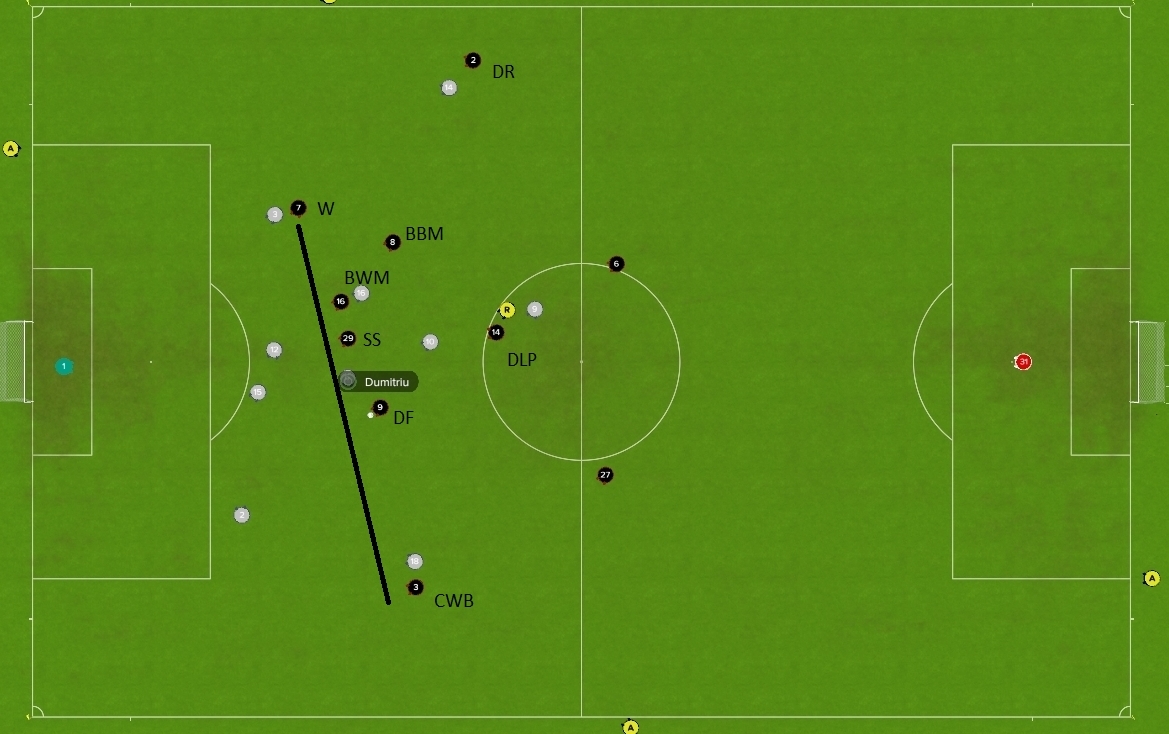
The only ‘disruptions’ from the usual scenario is the BWM being higher up the pitch, given he has just won the ball back in an advanced position. The functions that this kind of movement and attacking movement perform are various and beneficial for both the player and the team in the context of this system for a number of reasons:
– the W pushing up usually creates space for our deep runner (the BBM) who can get in the box easier as a result
– the W attacking the far post means he is our main threat from early crosses by the CWB
– the W provides the most advanced passing option the team has for a crucial reason: he has the best ability in the team to take a man on and thus create heavy numerical advantage
– the design of the system means he is one of our most supported players on the pitch: FB on the right providing defensive cover and deep passing option, DLP supplying with long balls to run on to, SS, BBM and DF as close passing options and CWB supplying crosses to the far post.
Turcu stats 2031-32:

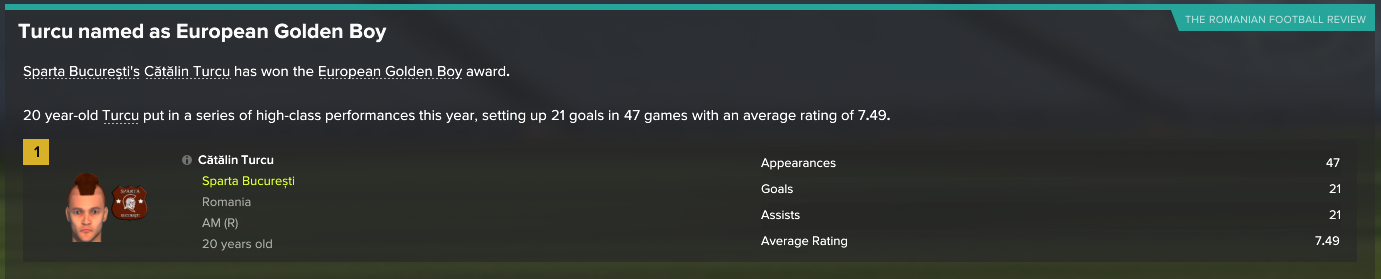
European Golden Boy for the 2031 year
Turcu stats 2032-33

European Golden Boy for the 2032 year

